Colonial Style End Tables Makeover

Hey painting friends! For today’s project I’m working on a set of 2 vintage end tables for your living room that I found at a flea market. These colonial style end tables were definitely looking like they were ready for the trash and my husband thought I was nuts for wanting to buy them. But he just couldn’t see what some paint could do for this wood furniture to give it new life.
They’re pretty crappy looking colonial style end tables, right? These wood end tables had drawers but no knobs on them, were very dirty, had buckling veneer on the backs, and had a really funky smell. Not your typical find at the thrift store or garage sale, but more like what you’d find on the curb for trash day.
But the good news is they were solid wood and not that cheap sawdust furniture. And the original door handles and hinges were still there. They just needed some new knobs on the drawers, a good cleaning, some wood glue, and a lot of love. So let’s see what we can do to these with this step-by-step tutorial!
How To Start Making Over Your End Tables
The most important step was to clean the end tables down to get rid of all that dirt and smell. The doors came off along with their hinges. I scrubbed on the doors and the rest of the table with some disinfectant cleaner several times before the smell finally went away. It was not a fun job. You wouldn’t believe how dirty these old end tables were. They probably had been sitting in someone’s basement or garage for some time.
The next step was to sand everything down to get a smooth finish and a way for the paint to adhere better. The original finish was pretty much gone and needed to be sanded several times over the entire piece using different grades of sandpaper. I started with a medium grit sandpaper and worked my way up to a fine grit sandpaper. Then I wiped the tables off with a lint-free cloth to get any dust left behind before painting my first coat.
I also had to glue the veneer back down on the backs of the tables and clean the door hardware with some furniture stripper. I used CitriStrip as an easy way to get them back to their original gold color. After a few coats of stripper they did come clean and looked shiny and new. Now we’re ready to paint.
What To Paint Your Colonial Style End Tables With
So what kind of paint do you use for your furniture makeovers? Actually, you can use just about anything you want, but it will depend on the look you are going for and what the furniture piece is going to be used for. Are you wanting a nice smooth shiny finish in one or two colors, or do want a distressed and rough farmhouse look? The possibilities are endless.
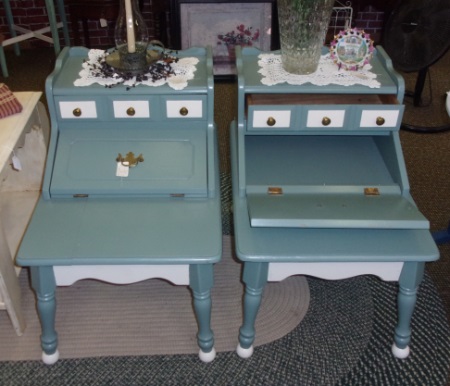
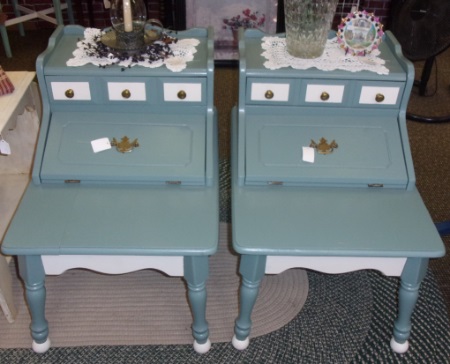
Since I was not familiar with chalk paint at the time I painted these, I used Valspar Semi-Gloss Enamel Paint in a sage green color. It’s a nice paint to work with, goes on smooth, water clean-up, and dries a very nice finish. To accent the drawer fronts, the feet, and decorative apron on the bottom, I used another Valspar Semi-Gloss enamel paint in a cream color.
Before painting I spread a large drop cloth underneath the tables to protect the floor. All the various parts of the tables got 2-3 coats of paint, allowing each coat of paint to dry for at least 24 hours before applying the next coat.
How To Finish Your Painted Piece Of Furniture
When using any enamel or latex paint, you want to let your furniture piece cure for several weeks in order for the paint to harden. I let the end tables sit for two weeks to let the paint cure before I applied a clear coat of wax to them. The furniture wax I use is MinWax Finishing Paste Wax in Clear.
The first step is to apply a thin, even coat of wax with a clean cloth, working on one section at a time, letting it dry for about 10 – 15 minutes. Once the wax was dry, I buffed it out using another soft cloth. After the entire table was waxed, the hardware was them put back on the doors and hinges back on the tables. For the drawers, I ended up purchasing some cute gold knobs to match.
Using two different paint colors makes for a colorful end table makeover. Using wax on the top of the table is a great way to make sure that you won’t end up with nasty water rings from either plants or drinking glasses. The two different colors also gives the old table a modern look to fit in just about anywhere.
So what do you think of this DIY project? Isn’t it amazing what a paint job can do? This vintage end table went from raw wood and a smelly mess to a restored little side table. The light colors sure brightened them up. I’m sure they’ll look nice in someone’s home.

Here are the finished colonial style end tables sitting in my shop for sale. You can see in the one photo how the table looks when the door is open for the cubby space inside. That would be a great place to hide your knitting project or magazines.

So, here’s proof that something that was once one man’s trash is another man’s treasure if you just give it a furniture makeover! With a little effort you can have something that will last for years to come. Do you have any ideas now for your next project? Be sure to stop by again to see what I work on next time!

All Rights Reserved
Site Design by The Creative Impact
Site Design by The Creative Impact |
© 2025 Hen House Acres |
Let's Connect!
send me the list